



Creating a New Campaign in Proof Blazer
This guide helps you create a new Proof Blazer campaign step by step.
Step 1: Log In
1. Log in to your Proof Blazer account.
Step 2: Install the Widget Code
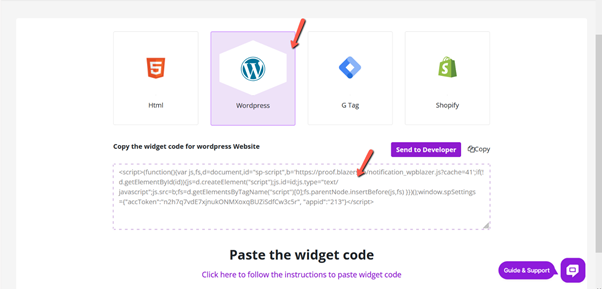
1. Go to Install Widget Code.
2. Select your website platform (Shopify, WordPress, WooCommerce, or others).
3. Copy the widget code shown on the screen.
4. Paste this code into your website (usually in the header or integration section).
👉 Once the code is added, your website is ready to show Proof Blazer notifications.
Step 3: Start Creating a Campaign
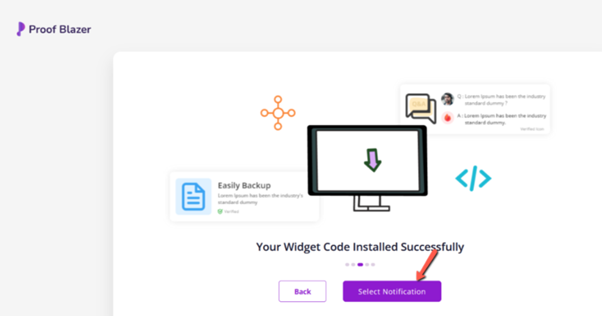
1. Go back to the Dashboard.
2. Click Select Notification.
Step 4: Choose Campaign Type
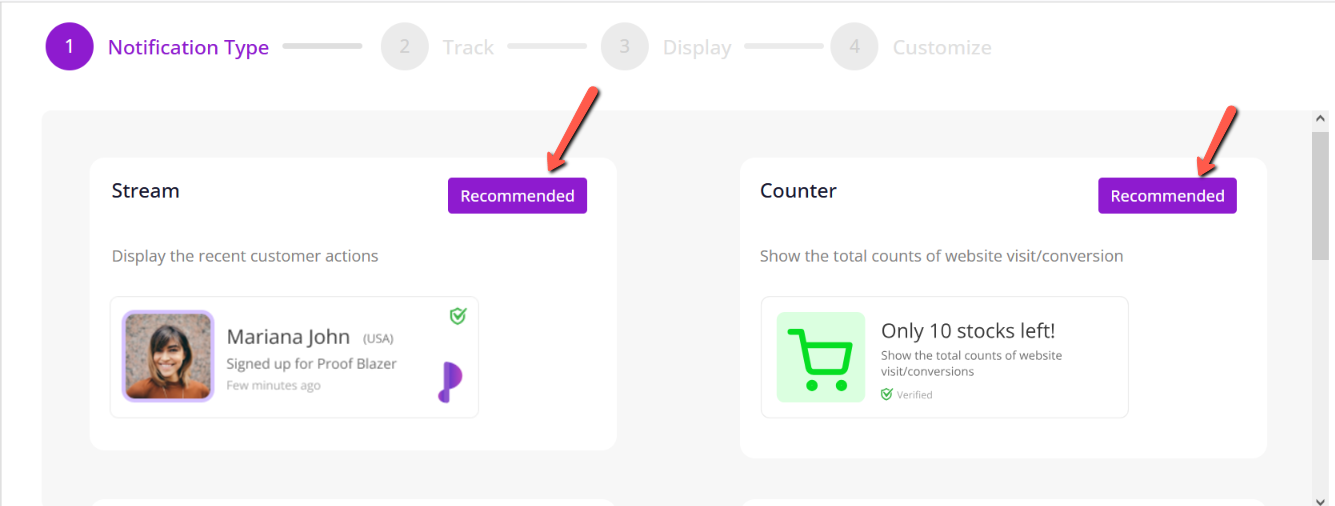
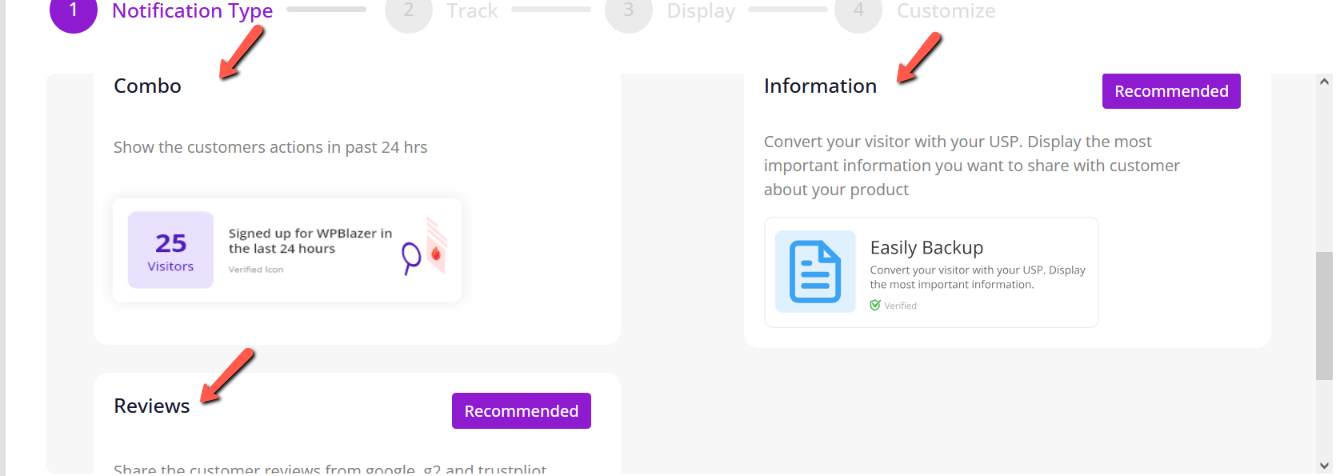
Choose the campaign type that fits your goal:
- Stream – Show live customer actions (sign-ups, purchases).
- Counter – Show numbers (visitors, users, sales).
- Combo – Mix multiple notification styles.
- Information – Share announcements or offers.
- Reviews – Display customer reviews and testimonials.
Step 5: Customize Your Campaign
1. Select the campaign you want.
2. Customize the message, design, position, and pages.
3. Preview the campaign to see how it looks.
Step 6: Launch
1. Click Launch.
2. Your campaign will now appear on your website.
🎉 That’s it! Your Proof Blazer campaign is live and helping build trust with visitors.
Need Help?
If you get stuck, you can always:
- Use the Help Centre
- Contact Live Chat
- Email [email protected]